Getting started
First-week setup checklistNew
A pictured walk from a new company to a published page, a booking, the till, and cash up.
This is the first week for a new company on XZONO. The pictures are from XZONO Business Demo: a company that is not VAT registered, with a branch called Demo Studio, two employees, a Capitec account, five products, and five services.
Each picture has a button under it. The button opens that screen for the company you already have open, so you do not have to hunt through the menus. The top bar in the picture is the same bar you use: Accounting, Users, Global, Home Screens, Schedule, and POS.
Add the company
Click Accounting in the top bar, then Add company. Type the company name, business type, registration number, email, telephone, branch name, and street address. If the company is not VAT registered, leave VAT registered unticked. If it is VAT registered, tick VAT registered and type the VAT number. The VAT number stays locked until that box is ticked. Click Create company.
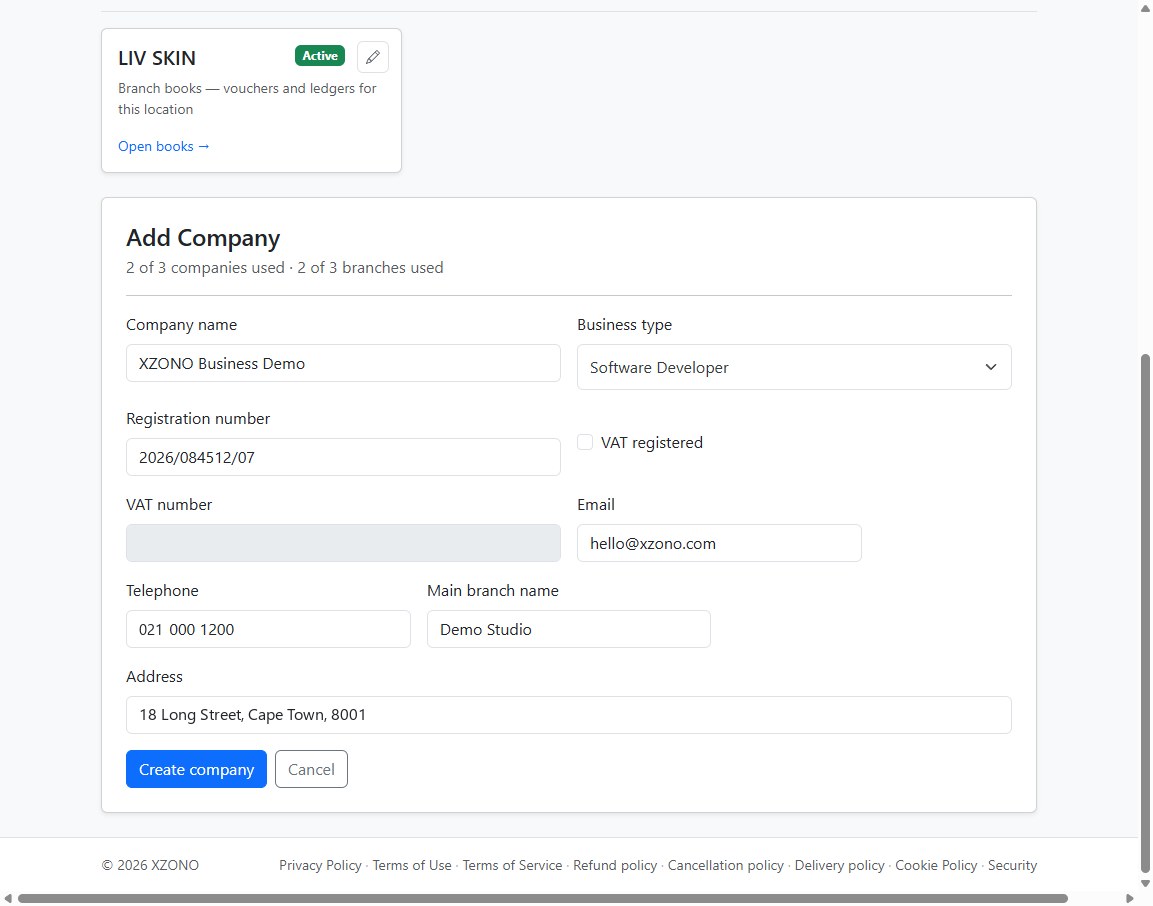
Accounting → Add company. The demo company is not VAT registered, so the box is unticked. Tick it and type the VAT number when the company is registered.
Open a financial year
Click Accounting, then the branch. On the books page, click the Financial Year card. The demo year is FY 2026/27, 1 March 2026 to 28 February 2027. Click Create year. Opening balances and the till post into that year.
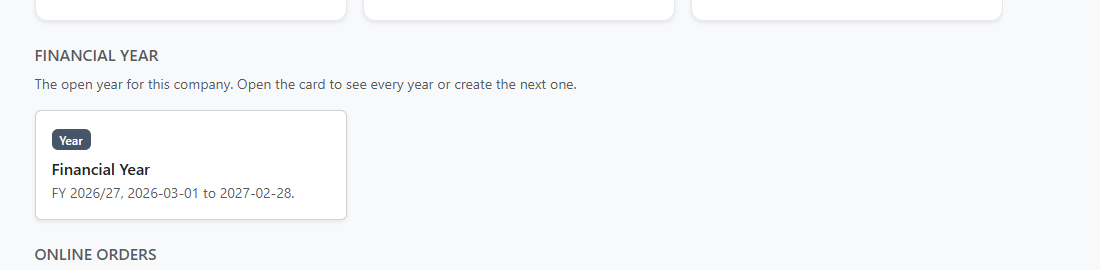
The Financial Year card on the branch books. Click this card. It is not inside a menu.
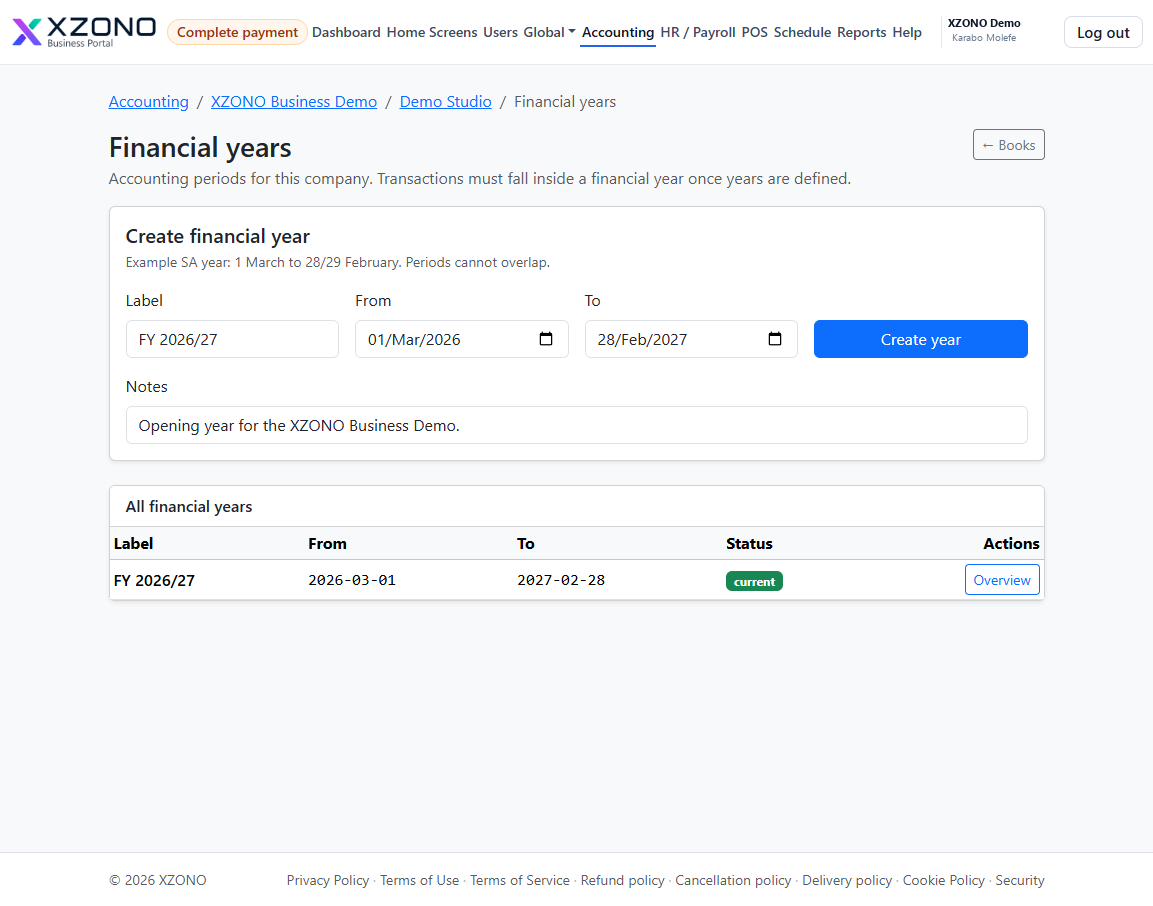
Financial years for Demo Studio. FY 2026/27 is the current year. Click Create year to add one.
Invite the people who will work
Click Users in the top bar. The Invite user box is on the right. The demo invites Thandi Mthembu and Lerato Dlamini, on Demo Studio only, role Employee. You never type their password. They get an email, open the link, and choose a password on Company invite.
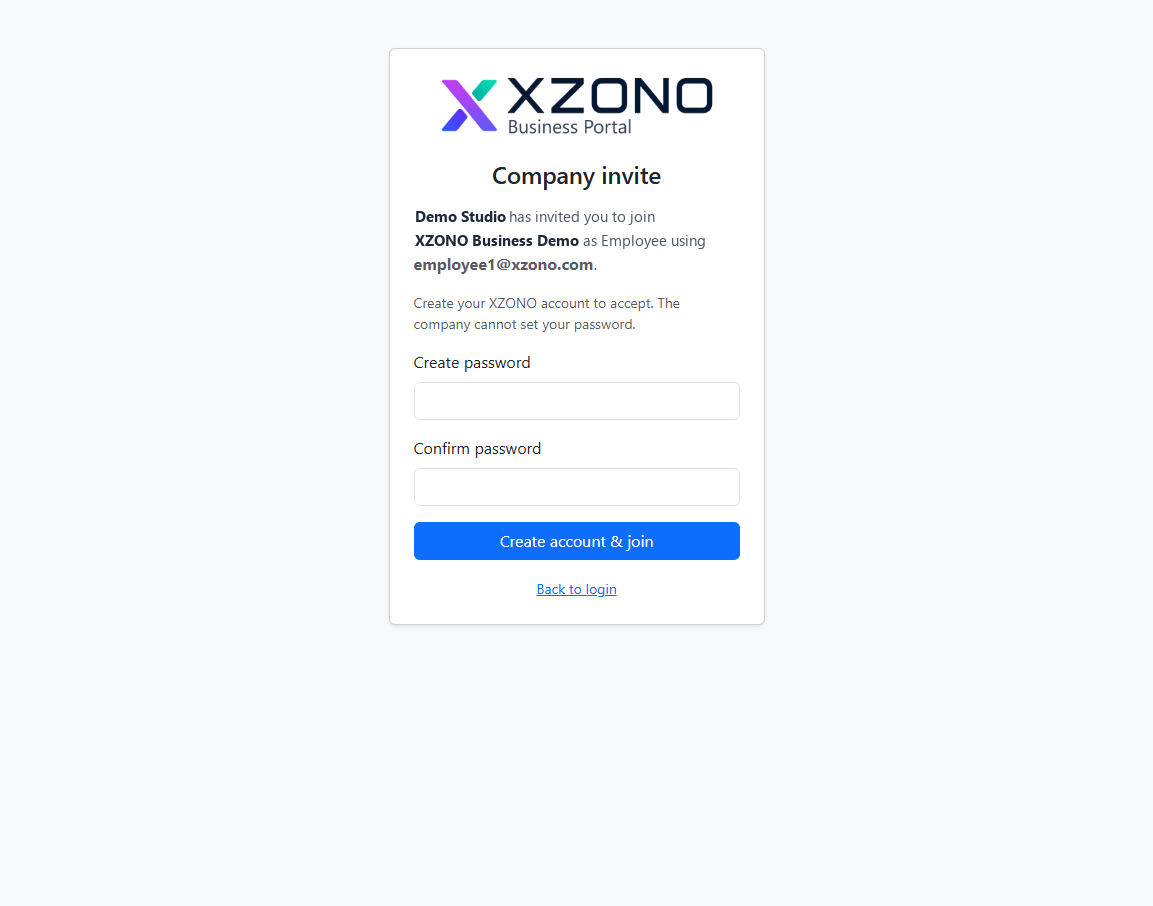
Users in the top bar opens Invite user. The email they receive opens this page. They create a password and join. You cannot set that password.
Link the bank
Click Global in the top bar, then Chart of Accounts, then the Banks tab, then Add bank account. Bank name Capitec, account name Business Cheque, leave Create new ledger under the Bank Account Group, type Cheque, branch code 470010, and the account number. Click Add bank. The new ledger sits under group 1120. The same bank shows on the branch dashboard so the public page can offer EFT.
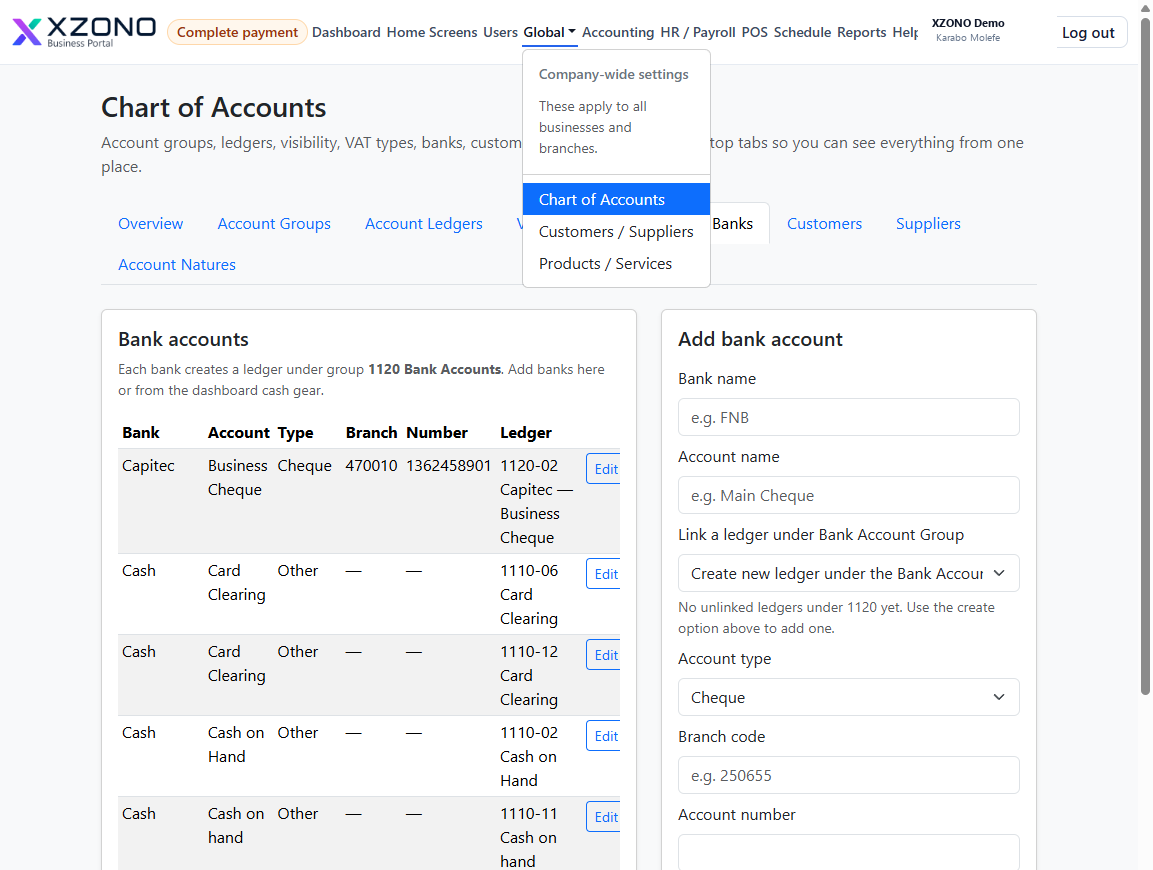
Global → Chart of Accounts → Banks. Create new ledger under group 1120, then Add bank.
Add products and services
Click Global in the top bar, then Products / Services, then New. The same list is the Products & services card after you open a branch under Accounting. Type Product, the name, selling price, purchase price, sales account, cost of sales, and inventory. Write the description and the public text buyers see. Tick Show on POS. The demo then adds four more products the same way: till card, desk stand, window decal, and staff lanyard.
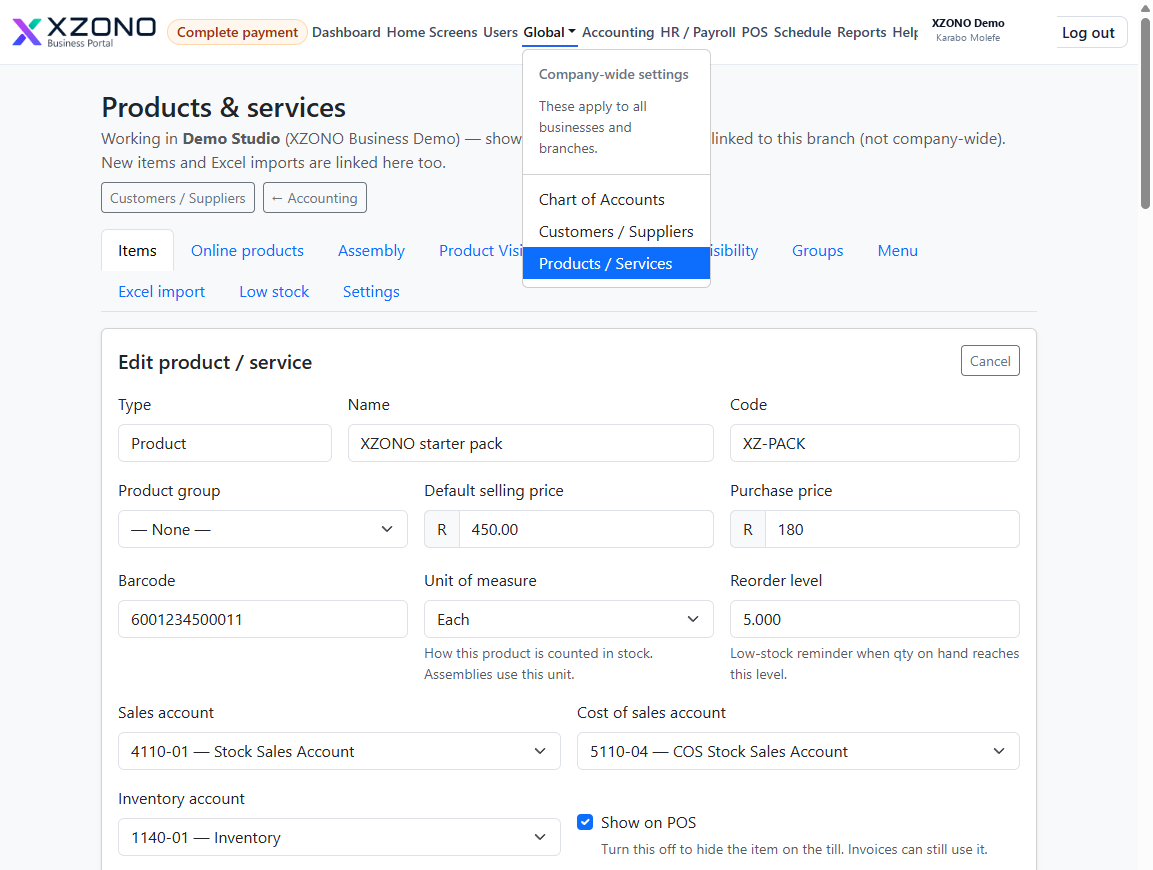
Global → Products / Services → New. One product, filled in. Services use Type Service and a hands-on time instead of stock.
The five services are Scheduler walkthrough, POS walkthrough, Books setup, Home screen setup, and Online shop tour. Help → Products & pricing explains groups, branch prices, and Show on POS in more detail.
Hours, then who can do which service
Click Schedule in the top bar, then the branch, then Work hours (the gear). Business hours are what a client can book online. Untick Closed for Monday to Friday and leave 09:00–17:00. Saturday and Sunday stay closed. Click Save business hours.
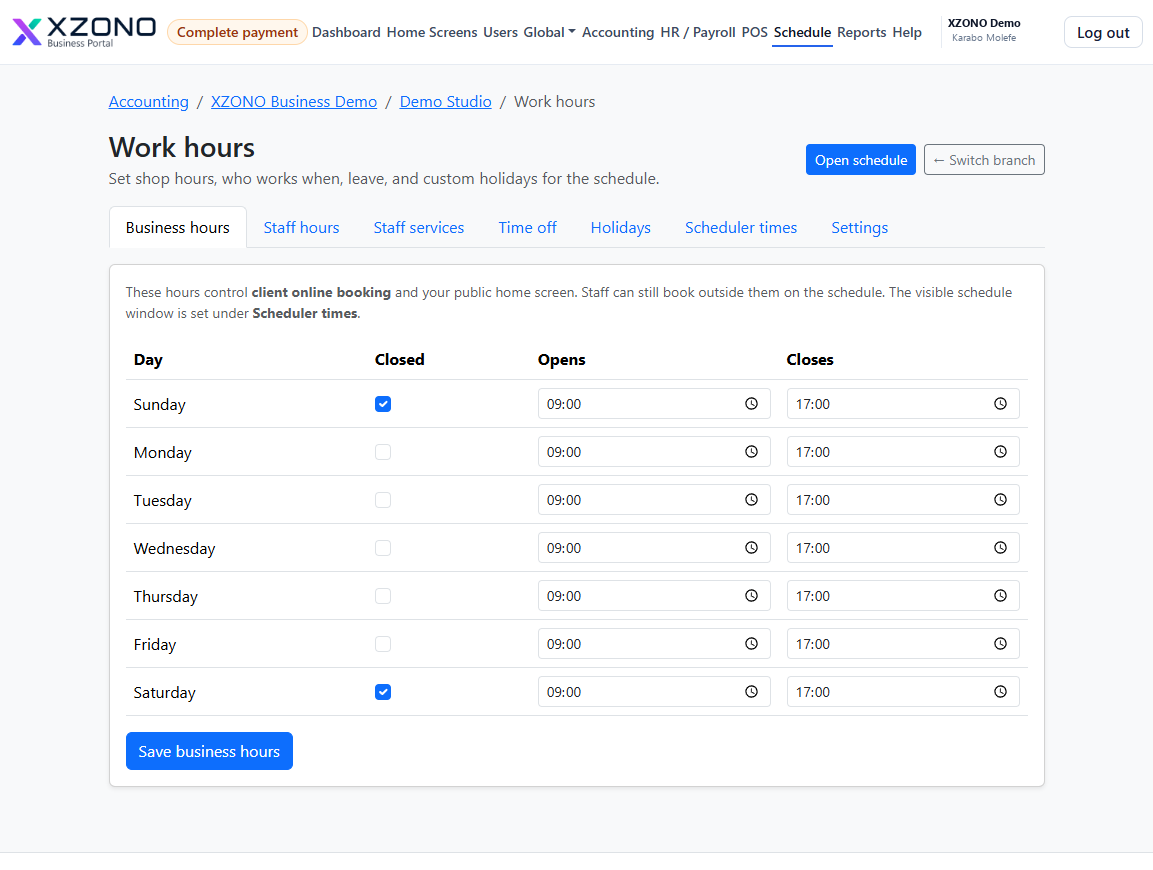
Schedule is highlighted in the top bar. Business hours: Monday to Friday, 09:00 to 17:00.
Stay on Work hours and open the Staff hours tab. This is each person’s own week. Thandi works the shop days. Lerato works Tuesday to Saturday, so the diary shows a different week. Click Save on that person’s row.
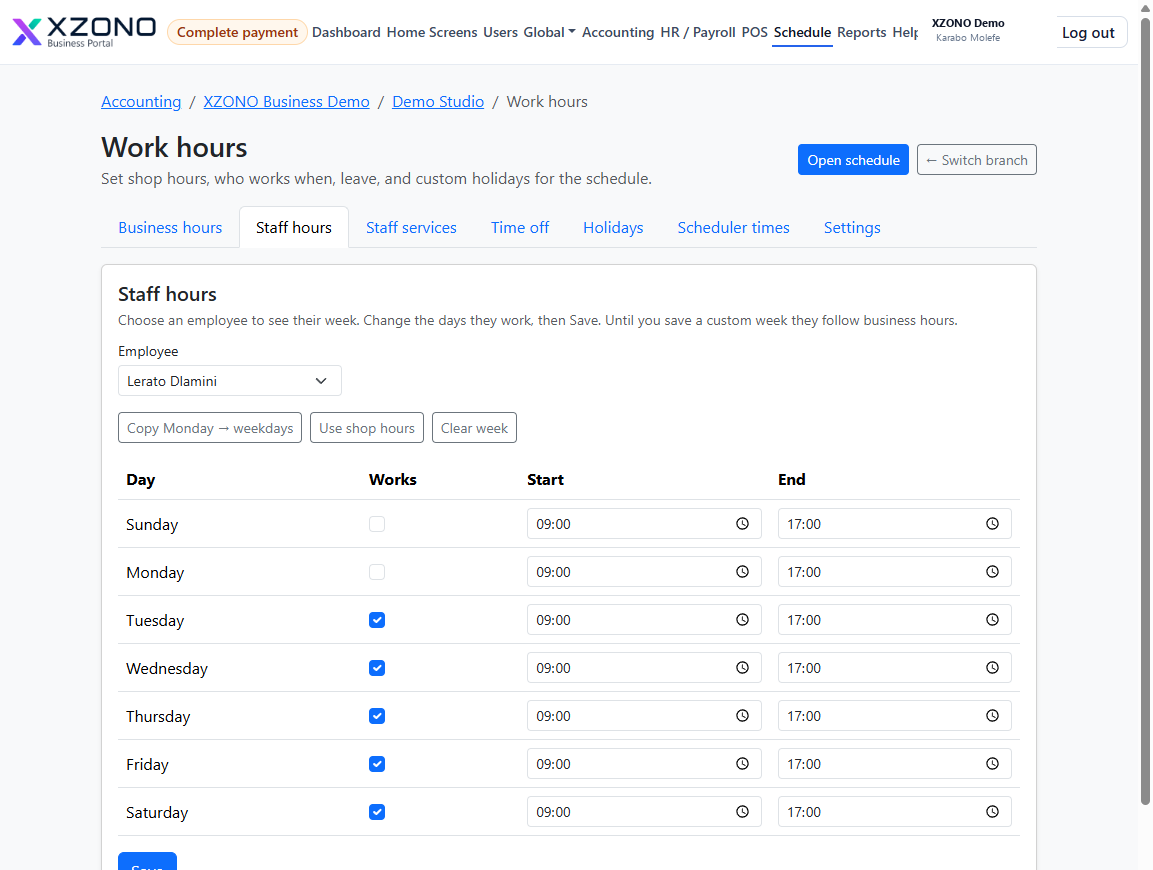
Schedule → Work hours → Staff hours. Lerato’s Monday is off. Her Saturday is a working day.
The Staff services tab decides who appears when a client picks a service. An empty column means that person can do every service. Tick the boxes when someone only does part of the menu, then Save staff services.
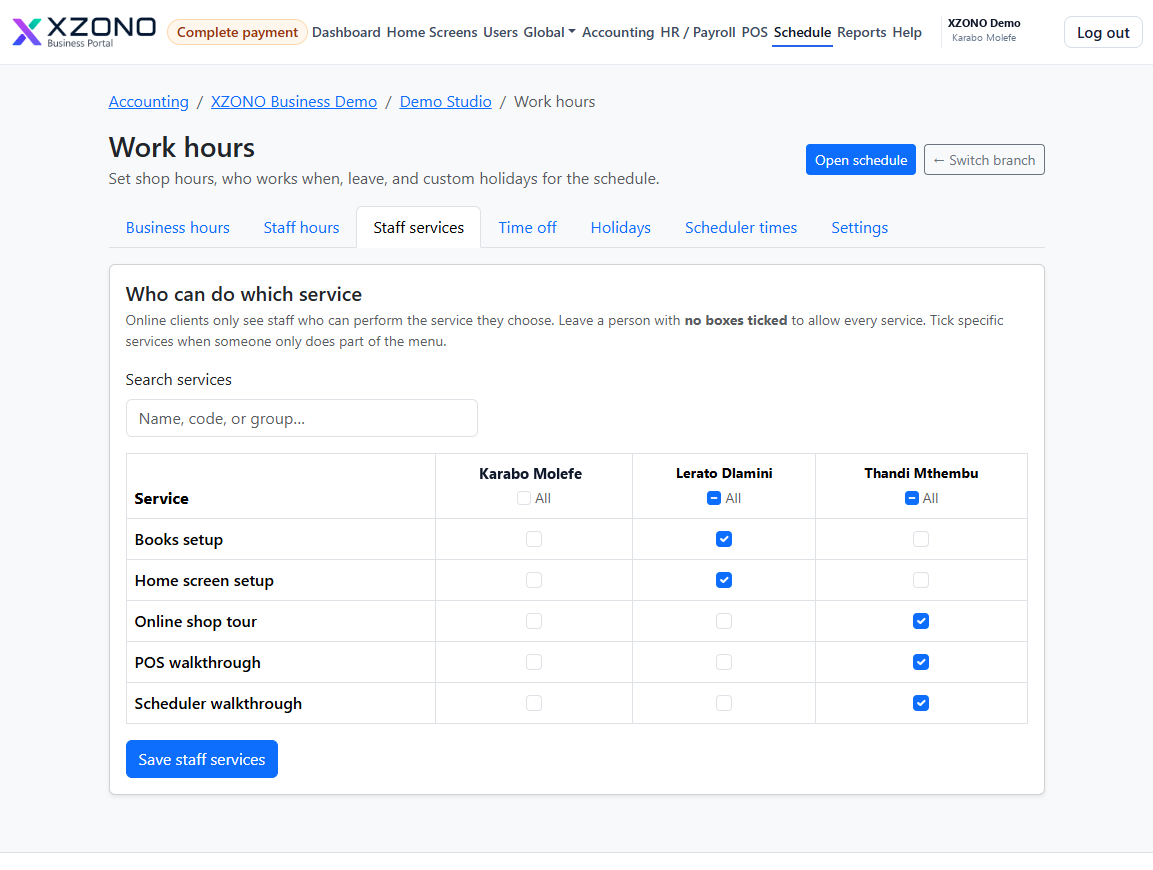
Schedule → Work hours → Staff services. Tick who can do each service, then Save staff services.
Publish the home screen
Click Home Screens in the top bar, then the company, then Create or edit public page. Turn on Published, Allow online bookings, Show pricing, and Show products. Sell online can be on once the branch has a bank; buyers then pay you by EFT. Fill the public name, slogan, about text, and the street address. Add the logo, cover, and gallery. Save.
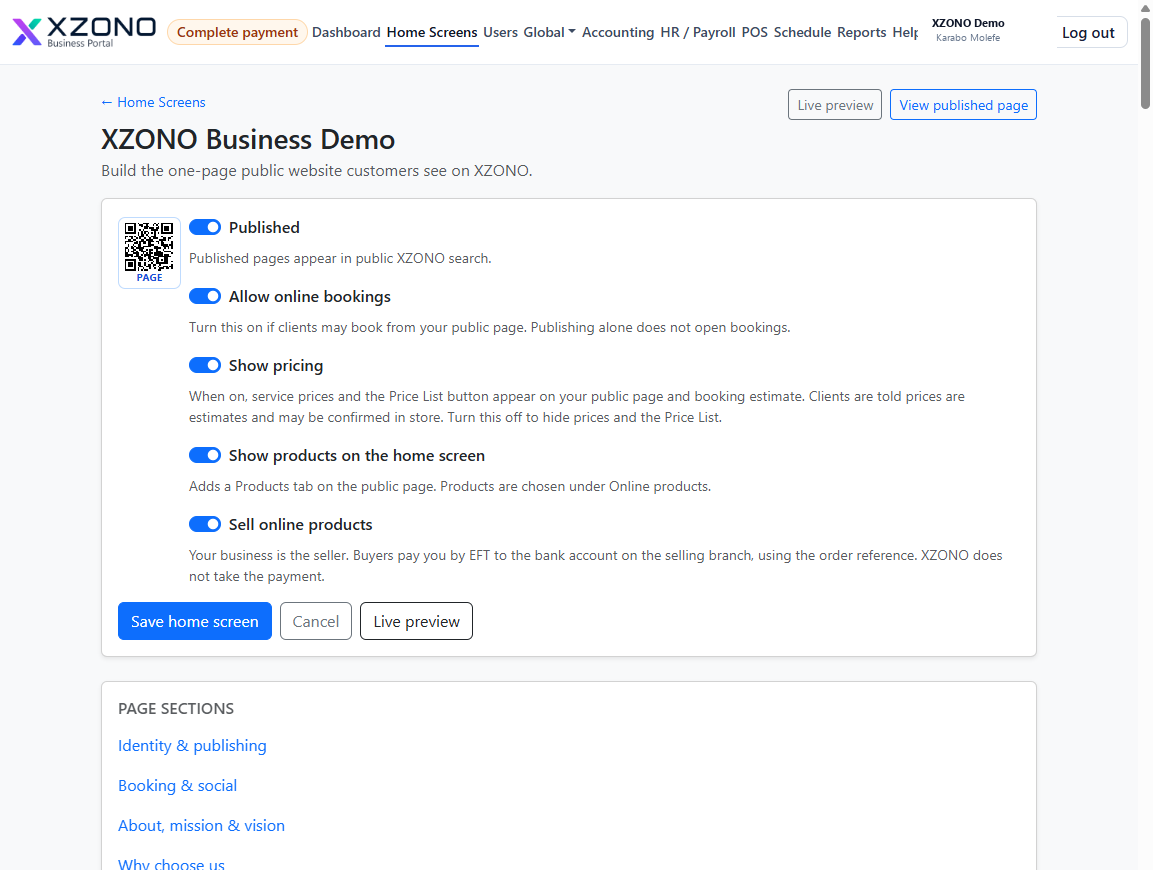
Home Screens is highlighted in the top bar. Published alone does not open bookings. Allow online bookings does that.
Where you left off in your previous package
If you are moving from another accounting package, this is where you record the balances you left off with. It is not a new sale and it is not a new invoice. It is the starting position so XZONO matches the books you already kept: who owes you, who you owe, and what was in the bank on the day you switched.
Opening balances
Accounting → click the branch → Opening balances → New opening balance. Date it on the first day of the year. Debits and credits must match before Save is allowed. Stock is not on this voucher. Stock comes in on a stock adjustment, which debits Inventory and credits cost of sales. Putting stock here as well would count it twice.
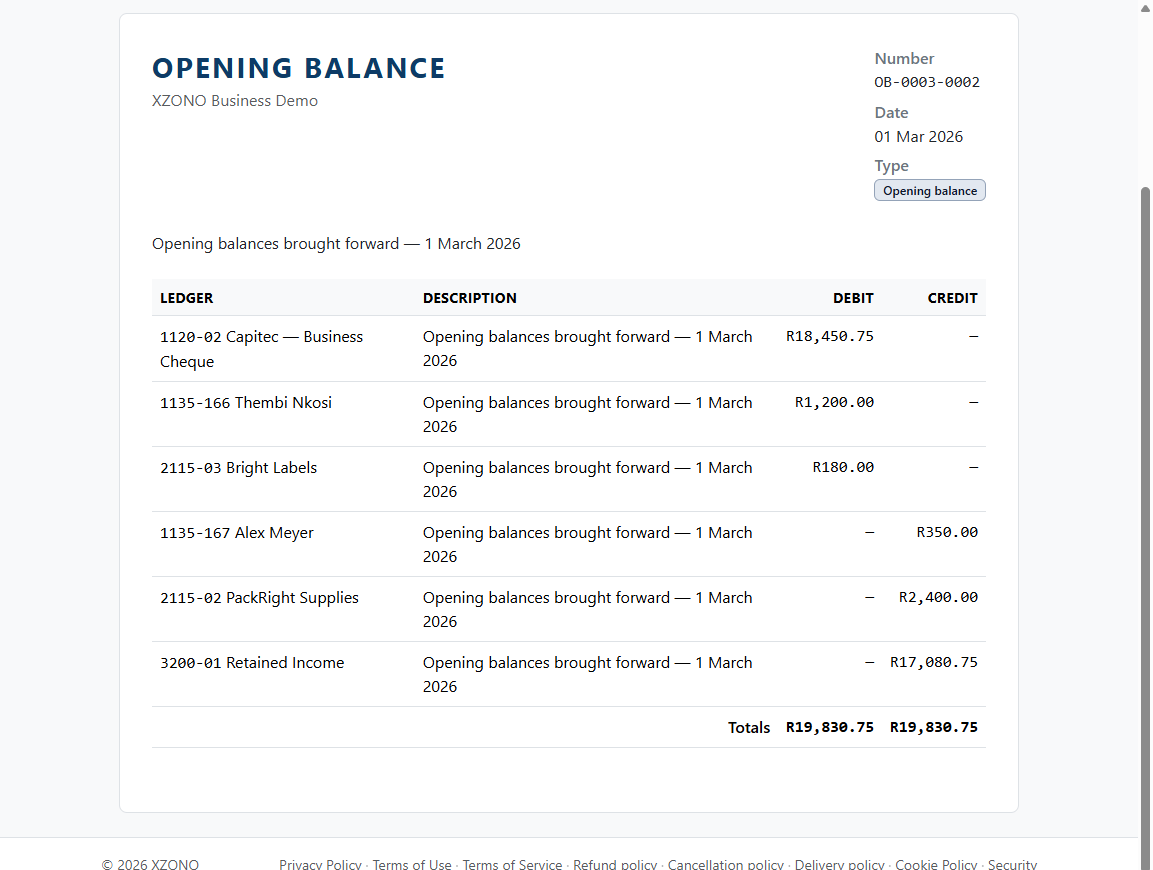
The full opening-balance journal on 1 March 2026. Every line is on the voucher: bank, customers, suppliers, and Retained Income. Debits R 19,830.75 equal credits R 19,830.75.
Opening stock
Accounting → click the branch → Stock adjustments → New. Positive quantities bring stock in. Unit cost is the purchase price. This posts inventory and cost of sales. It is separate from the opening-balance voucher.
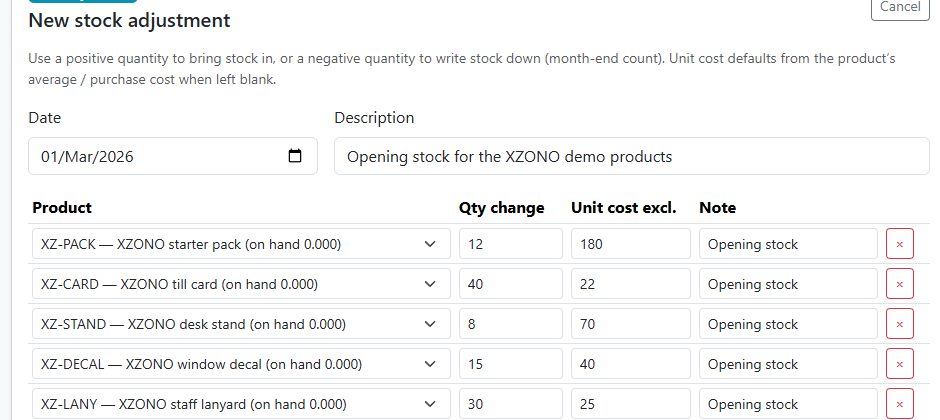
Opening stock for the five demo products. Save posts the quantities onto the shelf.
What the client sees
These pictures are the client portal. A client never sees your books, your till, or your journals. They open your public page, choose a service, pick a person and a time, and request the booking. My bookings is their own list, and a new request stays Pending until you confirm it.

Client portal. The public page after the home screen is published: slogan, pictures, and address.
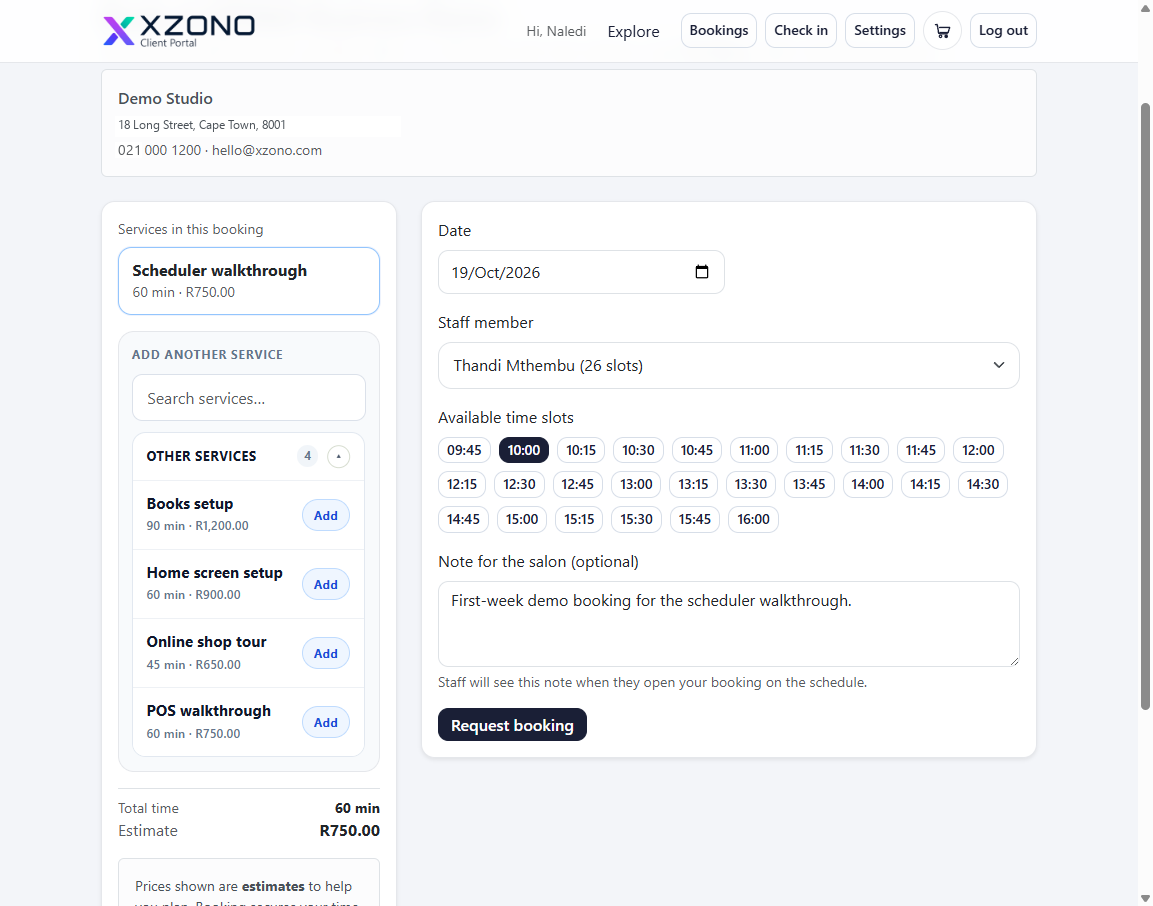
Client portal. The client books Scheduler walkthrough with Thandi at 10:00, then Request booking.
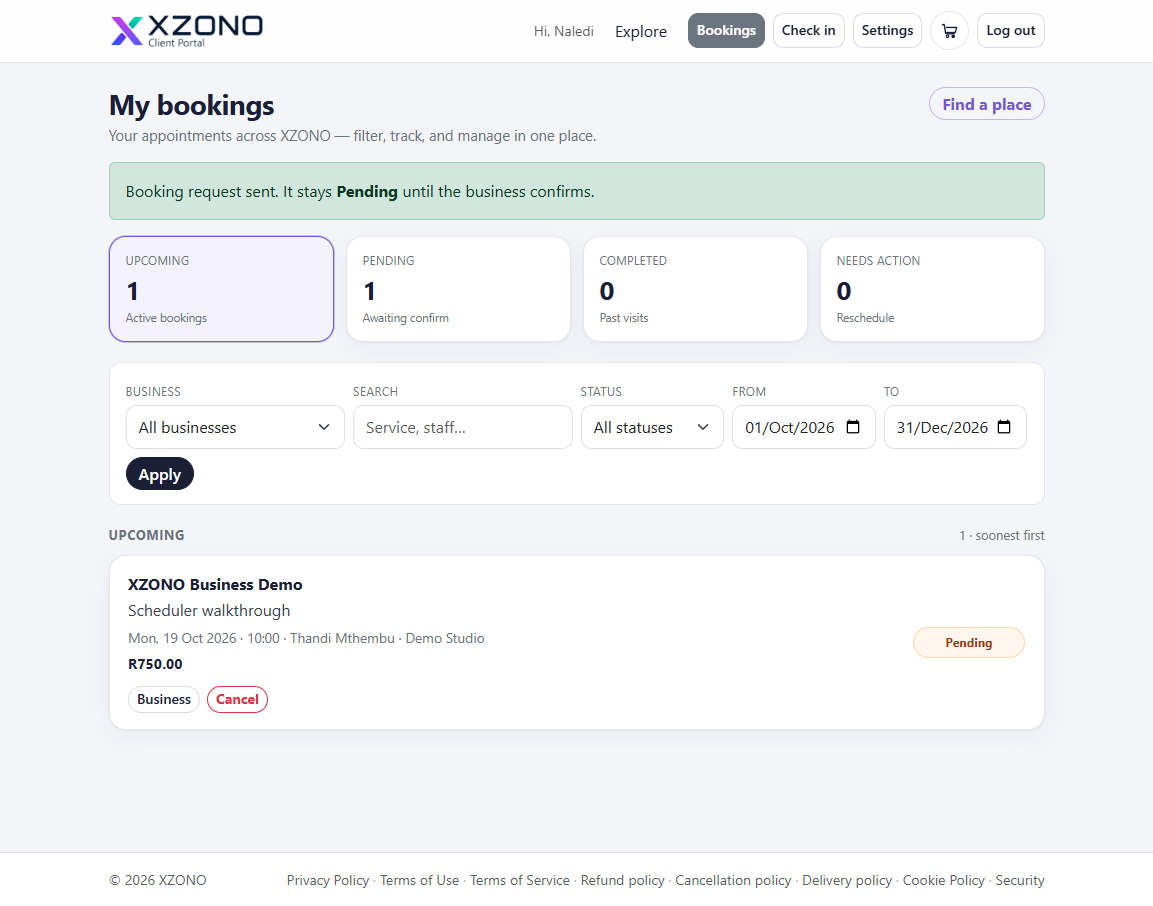
Client portal. My bookings shows the request as Pending. The client waits here until you confirm it.
What you see in the accounting package
This is the same booking inside your accounting package. Click Schedule in the top bar, then the branch. Day view is one column per person. The booking sits in that person’s column for the booked time. On a Monday Lerato’s column says Off, because her week is Tuesday to Saturday. Open the booking and Confirm.
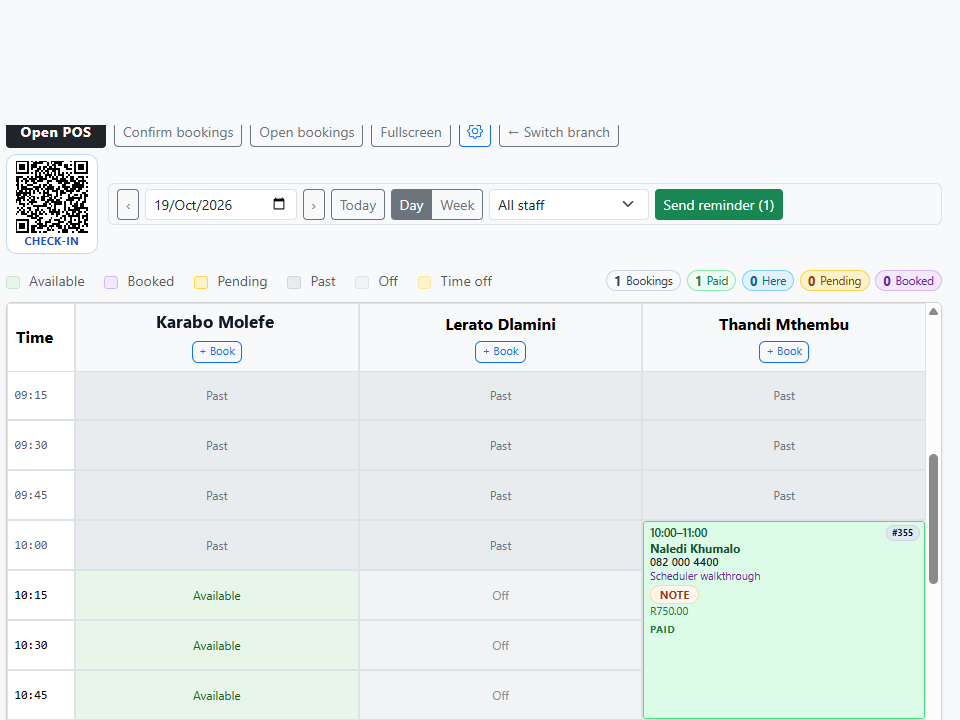
Inside the accounting package. Day view, 19 Oct 2026. Scheduler walkthrough is in Thandi Mthembu’s column from 10:00 to 11:00.
Pay / Send to POS parks the booking on the till. Click POS in the top bar, log in with an opening float, choose CASH, and Complete sale.
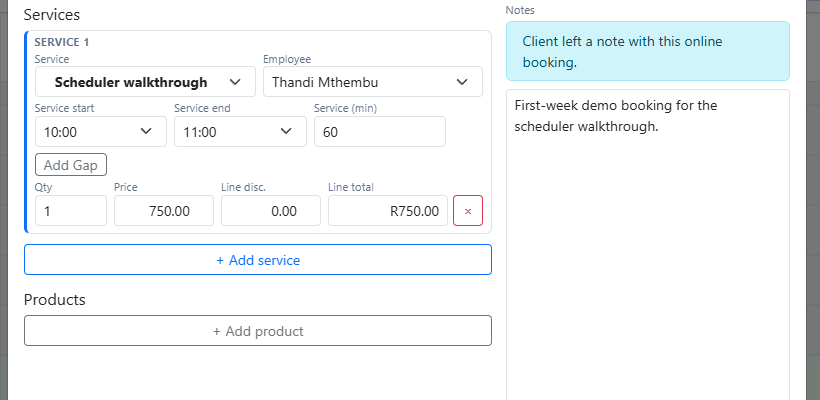
Inside the accounting package. Confirmed booking. Pay / Send to POS moves it to the till.
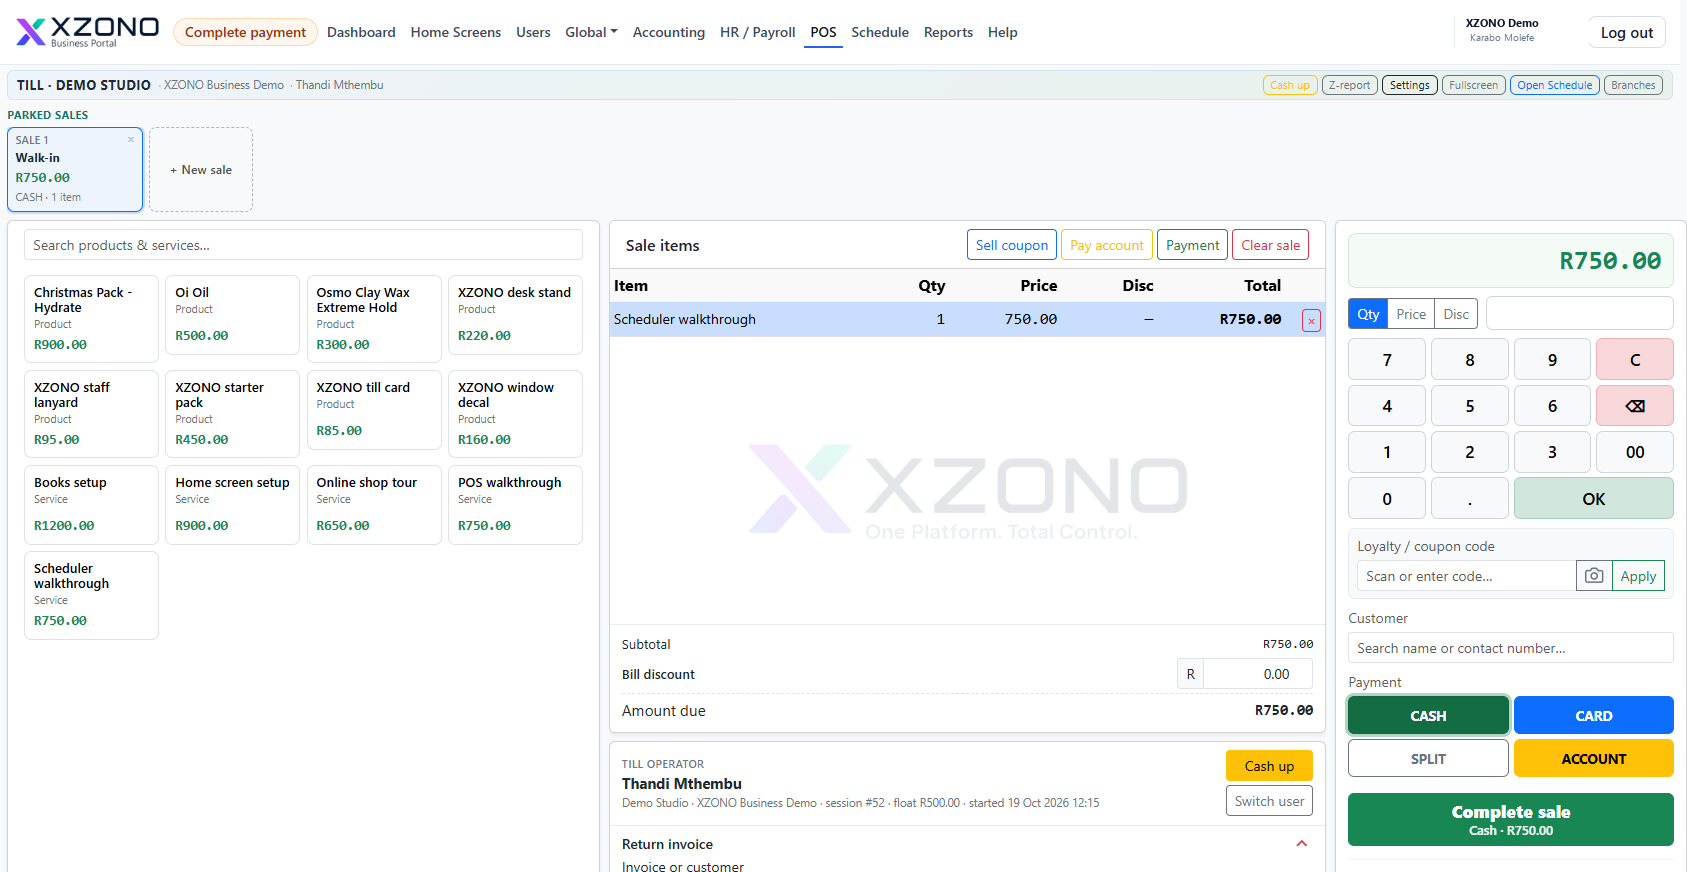
Inside the accounting package. POS in the top bar. The till ticket has CASH selected for R 750.00, then Complete sale.
Cash up counts the drawer. Expected cash is the opening float plus the cash sale. If the count matches, close the till. The Z-report is the record of that shift.
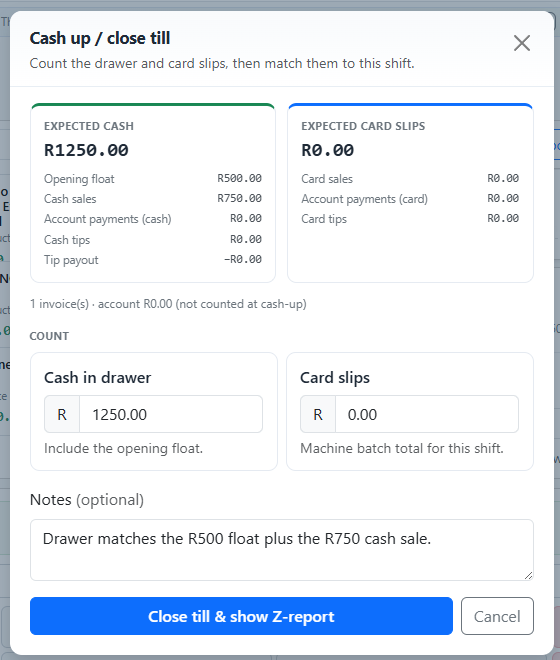
Cash up on the till. Expected cash is the R 500 float plus the R 750 sale.
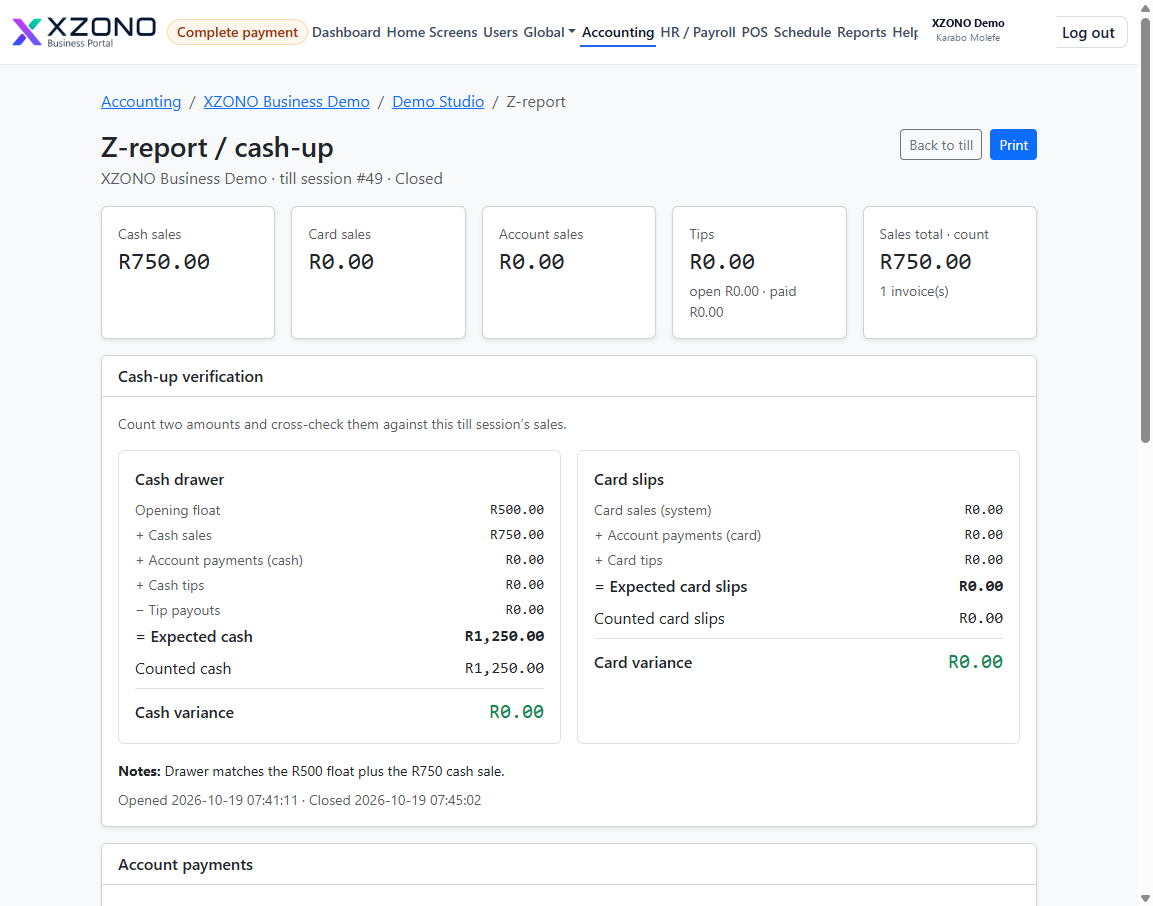
The Z-report after the till is closed.
A card sale
A card sale uses the same till. Log in, add the item, choose CARD, and Complete sale. You do not pick an account on the till. CARD is set up to post to Card Clearing, the cash and cash equivalents account whose name contains “card”.
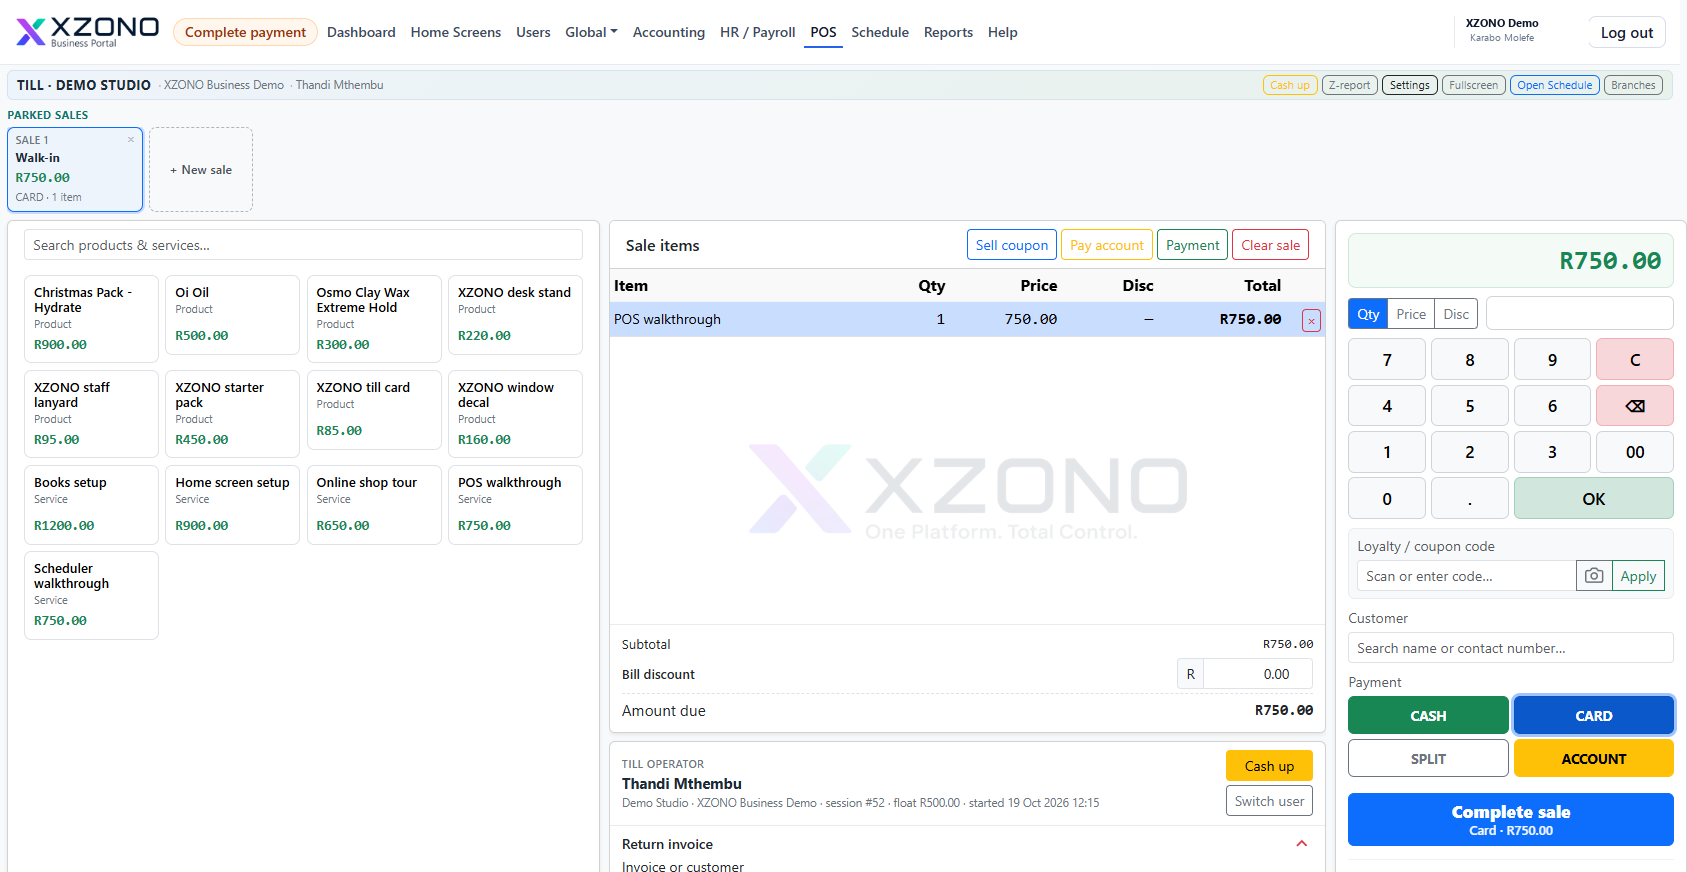
POS in the top bar. The till ticket has CARD selected for R 750.00, then Complete sale. The keypad is on the right.
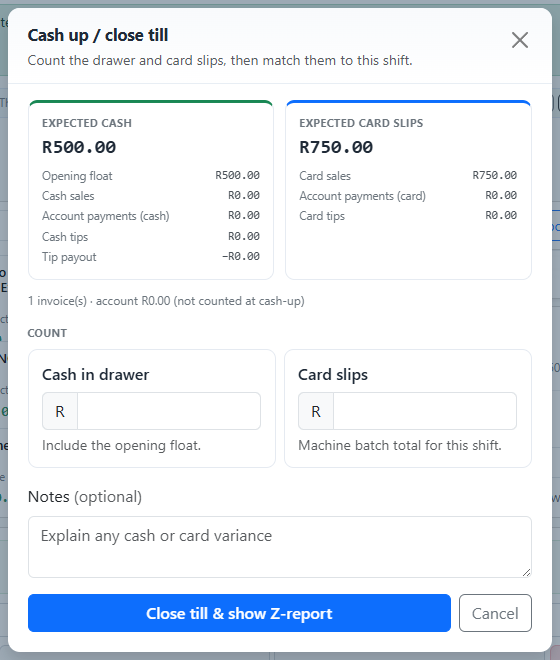
Cash up after the card sale. Expected card slips are the R 750.00 card sale. Expected cash stays the opening float, because no cash was taken.
Close the till, then open Accounting and the branch. On the books page, Cash & cash equivalents shows where the money sits. Card Clearing holds the card takings until the bank pays them in. Cash on hand is the cash you took on the till. The card money is not in the bank account yet.
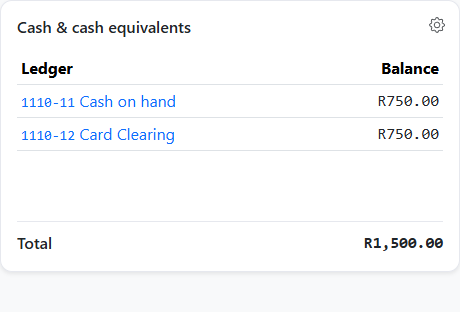
Books dashboard, Cash & cash equivalents. Card Clearing is R 750.00 after the card sale. Cash on hand is the earlier cash sale.
When the card machine pays that batch into your bank, import the statement line on Bank reconciliation. Open the receipt. Set Match type to Cash & cash equivalents, choose Card Clearing, and click Save match. That links the money coming in to Card Clearing. Card Clearing goes back to zero, and the amount sits on the bank.
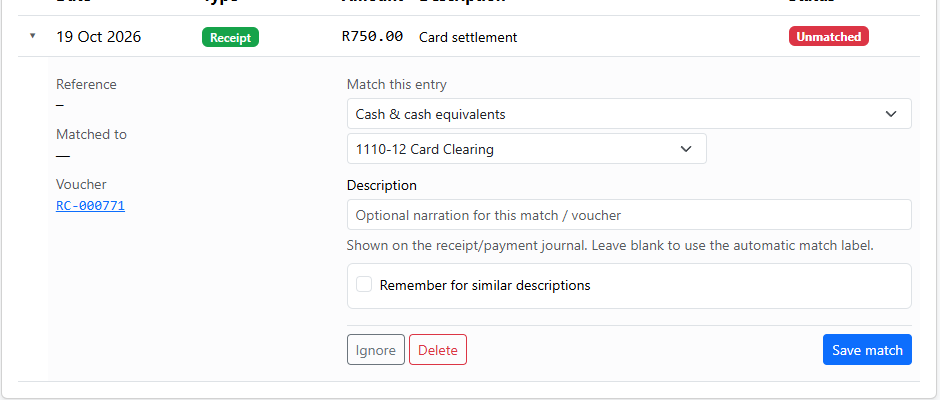
Bank reconciliation. The R 750.00 card settlement is matched to Cash & cash equivalents → Card Clearing, then Save match.
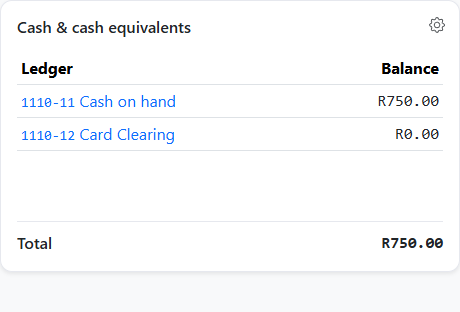
After the match, Card Clearing is R 0.00. The R 750.00 has moved onto the bank. Cash on hand is unchanged, because that was cash, not card.